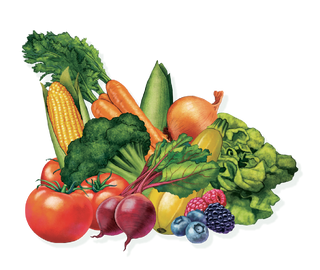
The Right Way to Start Seeds (Because there are a LOT of wrong ways!)
As you will recall from our last thrilling episode, we tried to pound home the importance of using a professional bagged potting soil/seed starting mix that contains no chemical fertilizers. Yes, Miracle-Gag products are the first thing you'll see in almost any garden center because they control the supply chain and pay for the best display. But any good independent garden center will also have natural and/or organic mixes that are chemical free. Most mixes in the US will be peat-based, which is fine by me, as I am convinced that Canadian peat bogs are harvested sustainably.
However, some mixes in the US substitute coir (shredded coconut fiber) for peat, and that's fine as well, especially if you're careful not to overwater, as coir (C O I R) doesn't seem to have as much natural antibiotic activity as peat, which can help reduce the chance of damping-off disease, a depressing condition caused by overwatering that results in your tiny little starts withering at the soil line and then joining The Choir Invisible.
If this happens, do not mourn; instead, embrace and learn from the valuable feedback you have just been given and buy your plants already started by professionals, of which you are clearly not one yet. Hey: "There's always next year".
Let's get started starting. As we said last week, start your seeds approximately 60 days before historical weather records reveal when you can expect your nights to be in the 50s and above. This has NOTHING to do with your {quote} "last average frost date". All THAT misleading number means is that you'll have a 50/50 chance of not experiencing actual freezing temps after that date, which is useless, as peppers, tomatoes and such are TROPICAL plants that suffer greatly if planted when NIGHTIME temps drop below 50 degrees F. And pay no attention to DAYTIME temps; that's a trap. Unless climate change goes even more Bizarro World, nighttime temps are the key. Defy me on this and misery will become your horticultural roommate.
Containers: There is no good substitute for the plastic four and six-plant containers that garden centers use; they have the right depth and drainage and can be reused for many years before they fall apart. And then you can recycle them. If you have no such leftovers, ask your experienced gardening friends for some of theirs; I have hundreds! Warning: If you use Kindergarten seed-starters like eggshell cartons and old yogurt containers don't blame me for the results. Professional seed starting kits are also fine.
Fill your containers with your seed starting mix. You will note that they feel impossibly light; good! That's what you want. Place the containers in a sink containing an inch or two of water and allow the containers to become moistened via their drainage holes. They will have a tendency to float while still dry, so place a brick or something overtop each one or add water gradually until they stop acting like Aquaman's bumper cars.
When you remove them from the sink, they should be totally saturated and feel much heavier. Now, place them on a metal tray that has a small lip to hold excess water. (I think normal people use these to make cookies.) Carefully place two seeds of the crop you want to grow in each 'cell'. Not one; and not twenty (unless the seed packet says "Packed for 2012"). Cover the freshly planted seeds with about an inch or less of your mix and mist the surface gently. (If you don't have a small hand mister, get one now.)
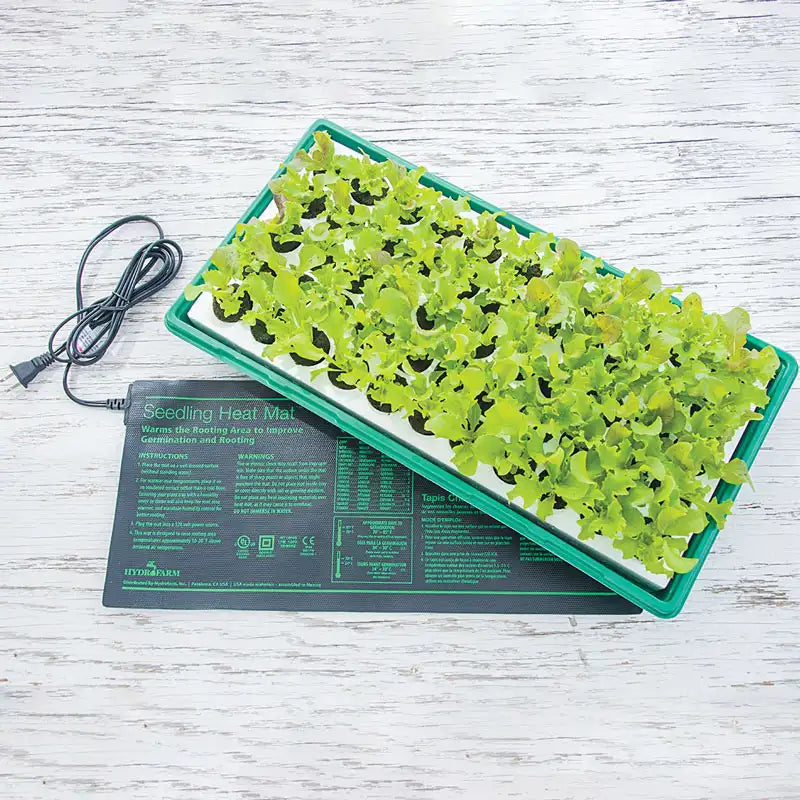
Now we need bottom heat. Professional seed starting heating mats will do the job perfectly and amortize nicely over the years; they'll keep the roots of your starts between 70- and 75-degrees F for speedy germination. Now is also the time to stretch Saran Wrap over your starts to keep them moist. If you're using a kit that includes a hard plastic cover, install it now. No light is required yet, but you need to have some idea of how you're going to provide that light in a week or so. (If your answer is 'sunny windowsill' you should now give up, watch more TV, and plan to buy professionally started plants online or at your friendly neighborhood garden center.)
Over the next week, you want to see water droplets beaded up on the plastic every day. If you don't see evidence of water, remove the plastic, mist the surface of the soil and replace the plastic. Don't go nuts with the water; evenly moist but not sopping wet is your goal. After a week, give or take, you should see sprouts. When you see the first sprouts appear, remove any coverings. Naked to the wind should your babies be. Within a few days the rest of the sprouts will be up (note: Pepper seeds take longer than tamatas). When everything is up that's likely to come up, remove the bottom heat.
Now go back in time and label all the individual cells with the variety they contain. Yes, I should have said this earlier but I was busy with a newly rescued stray cat who wants to sleep on my face in my bedroom and thinks loose pens are the ultimate play toy.
However, some mixes in the US substitute coir (shredded coconut fiber) for peat, and that's fine as well, especially if you're careful not to overwater, as coir (C O I R) doesn't seem to have as much natural antibiotic activity as peat, which can help reduce the chance of damping-off disease, a depressing condition caused by overwatering that results in your tiny little starts withering at the soil line and then joining The Choir Invisible.
If this happens, do not mourn; instead, embrace and learn from the valuable feedback you have just been given and buy your plants already started by professionals, of which you are clearly not one yet. Hey: "There's always next year".
Let's get started starting. As we said last week, start your seeds approximately 60 days before historical weather records reveal when you can expect your nights to be in the 50s and above. This has NOTHING to do with your {quote} "last average frost date". All THAT misleading number means is that you'll have a 50/50 chance of not experiencing actual freezing temps after that date, which is useless, as peppers, tomatoes and such are TROPICAL plants that suffer greatly if planted when NIGHTIME temps drop below 50 degrees F. And pay no attention to DAYTIME temps; that's a trap. Unless climate change goes even more Bizarro World, nighttime temps are the key. Defy me on this and misery will become your horticultural roommate.
Containers: There is no good substitute for the plastic four and six-plant containers that garden centers use; they have the right depth and drainage and can be reused for many years before they fall apart. And then you can recycle them. If you have no such leftovers, ask your experienced gardening friends for some of theirs; I have hundreds! Warning: If you use Kindergarten seed-starters like eggshell cartons and old yogurt containers don't blame me for the results. Professional seed starting kits are also fine.
Fill your containers with your seed starting mix. You will note that they feel impossibly light; good! That's what you want. Place the containers in a sink containing an inch or two of water and allow the containers to become moistened via their drainage holes. They will have a tendency to float while still dry, so place a brick or something overtop each one or add water gradually until they stop acting like Aquaman's bumper cars.
When you remove them from the sink, they should be totally saturated and feel much heavier. Now, place them on a metal tray that has a small lip to hold excess water. (I think normal people use these to make cookies.) Carefully place two seeds of the crop you want to grow in each 'cell'. Not one; and not twenty (unless the seed packet says "Packed for 2012"). Cover the freshly planted seeds with about an inch or less of your mix and mist the surface gently. (If you don't have a small hand mister, get one now.)
Now we need bottom heat. Professional seed starting heating mats will do the job perfectly and amortize nicely over the years; they'll keep the roots of your starts between 70- and 75-degrees F for speedy germination. Now is also the time to stretch Saran Wrap over your starts to keep them moist. If you're using a kit that includes a hard plastic cover, install it now. No light is required yet, but you need to have some idea of how you're going to provide that light in a week or so. (If your answer is 'sunny windowsill' you should now give up, watch more TV, and plan to buy professionally started plants online or at your friendly neighborhood garden center.)
Over the next week, you want to see water droplets beaded up on the plastic every day. If you don't see evidence of water, remove the plastic, mist the surface of the soil and replace the plastic. Don't go nuts with the water; evenly moist but not sopping wet is your goal. After a week, give or take, you should see sprouts. When you see the first sprouts appear, remove any coverings. Naked to the wind should your babies be. Within a few days the rest of the sprouts will be up (note: Pepper seeds take longer than tamatas). When everything is up that's likely to come up, remove the bottom heat.
Now go back in time and label all the individual cells with the variety they contain. Yes, I should have said this earlier but I was busy with a newly rescued stray cat who wants to sleep on my face in my bedroom and thinks loose pens are the ultimate play toy.