Seed Starting: The Basics
Q. In our last thrilling episode we told Janine in Washington State that she didn't need to start her pea and bean seeds indoors for transplant outside later. But she also asked about the best way to do such a thing, and it IS getting to be that time of year; AND millions more of you are preparing to do the gardening thing, especially to avoid thinking about the pandemic caused by a virus named after a tasty Mexican beer, so:
- If you have never started seeds indoors previously, be prepared for failure. But by all means, do it anyway. Seed starting indoors is very different than gardening outdoors, but the only way you'll figure out how to do it well is by making mistakes. (Apologies to the cannon fodder seedlings that died an ignoble death on a chilly windowsill many decades ago so that I would eventually become surprisingly good at this.) And there is no shame in buying plants that were professionally started while you try and learn how not to kill yours by week three. That said:
- Containers. This is not the time for an egg carton kindergarten project. The plastic six packs, four packs and onesies that garden centers use are made of the right material and have the proper depth and drainage. If you haven't saved up any, ask a gardening friend for some of theirs (we have lots; gardeners never throw anything away) or ask your local independent garden center to toss you a few when you buy your planting medium and seeds from them. And imply that you'll probably be back in six to eight weeks for replacement plants.
- The planting medium. This is not the Fortune Teller who predicts the exact day your starts will die, but the non-soil you will use to fill your containers. It should NOT contain any of your wretched garden soil or old potting soil you have used in previous year(s). If your clever plan to save money involves either of those non-options, 'there's a bus leaving for Des Moines at midnight; be under it.' Buy (yes, with money) a premium planting medium. This may be labeled 'potting soil', 'seed starting soil', 'Pro-Mix' or 'soil-free mix'. It will contain milled peat moss (or coir, which is shredded coconut fiber), perlite and/or vermiculite, and compost or "composted forest products."
- It should NOT contain chemical fertilizers like Miracle-Gro or Osmocote. It should also NOT contain 'water saving crystals' which are bogus and slimy. And bogus. It is fine if it contains small amounts of natural fertilizers like worm castings and such. You will probably not find a really clean mix at Big Box stores, where you should only be buying batteries and light bulbs anyway. Support your local independent garden center!
- It should NOT contain chemical fertilizers like Miracle-Gro or Osmocote. It should also NOT contain 'water saving crystals' which are bogus and slimy. And bogus. It is fine if it contains small amounts of natural fertilizers like worm castings and such. You will probably not find a really clean mix at Big Box stores, where you should only be buying batteries and light bulbs anyway. Support your local independent garden center!
- The System.
- Fill your containers with what we will now simply call potting soil for simplicity and for the use of not too many words. Fill them to the top because they will shrink a bit when wet. Place these containers in an inch or two of clean water; not city tap water; and allow them to take the water up through their drainage holes. When the containers feel a little heavier, add more water to the sink or wherever they are and let them saturate overnight. Now you won't have to worry much about watering during the germination period.
- When the containers are heavy as heck, drain the water out of the sink or whatever and let them sit for an hour or so. Then lift them up and place them on a stack of old newspapers. (No old newspapers? What is wrong with you?! At least buy your local Sunday paper and get paid back with the coupons!)
- Place your super-saturated containers on a moisture-proof surface or an old baking pan.
- Sow two seeds in each individual container (or 'cell') and cover them with about half an inch of that good quality potting soil. Mist the surface with clean water. If you don't have a mister, go to the freaking Dollar Store or wherever and get one! Oy~!
- Cover your saturated, planted and misted containers with Saran Wrap or some cheap generic version of that famous cling-free plastic.
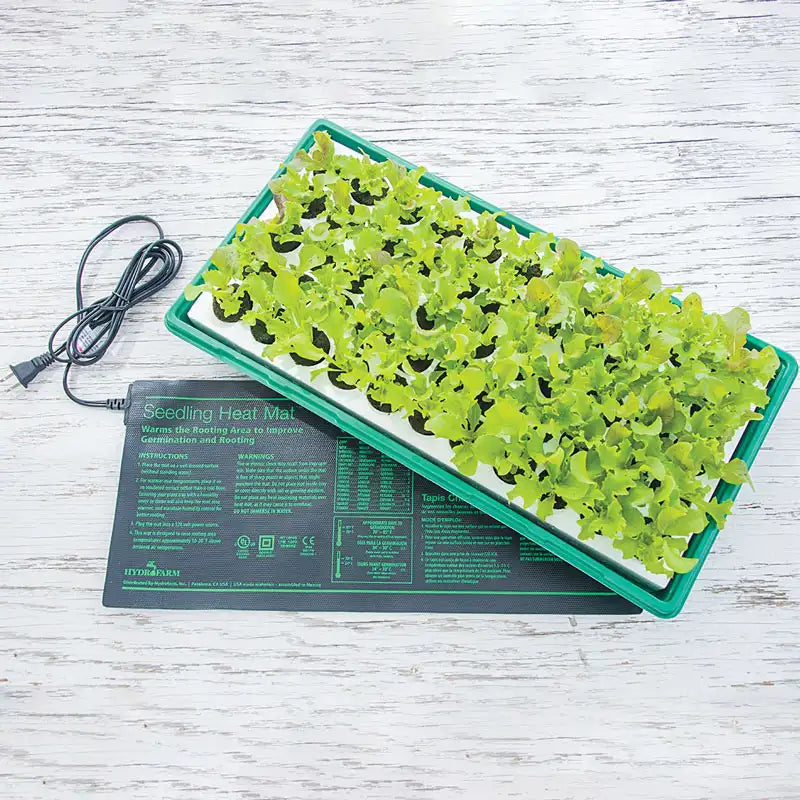
- Now you have a choice: you can either place these containers on a professional heating mat (amortize the cost over decades if, like Scrooge McDuck, you're adverse to spending the first dime you ever earned) or just leave them out on the warmest counter top of your home--which is fine for tomatoes but not so good for peppers, which love bottom heat and may take forever to germinate if they don't get it.
- Examine your dead plants-to-be daily and mist them again if moisture is not beading up on the Saran or Saran-like wrap. Keep the top of the soil moist.
- After the first green sprouts appear, CONGRATULATIONS! You're a third of the way there! Remove any Saran or Saran-like wrap and turn off any heating mats. We now enter the white-water rafting part of this river.
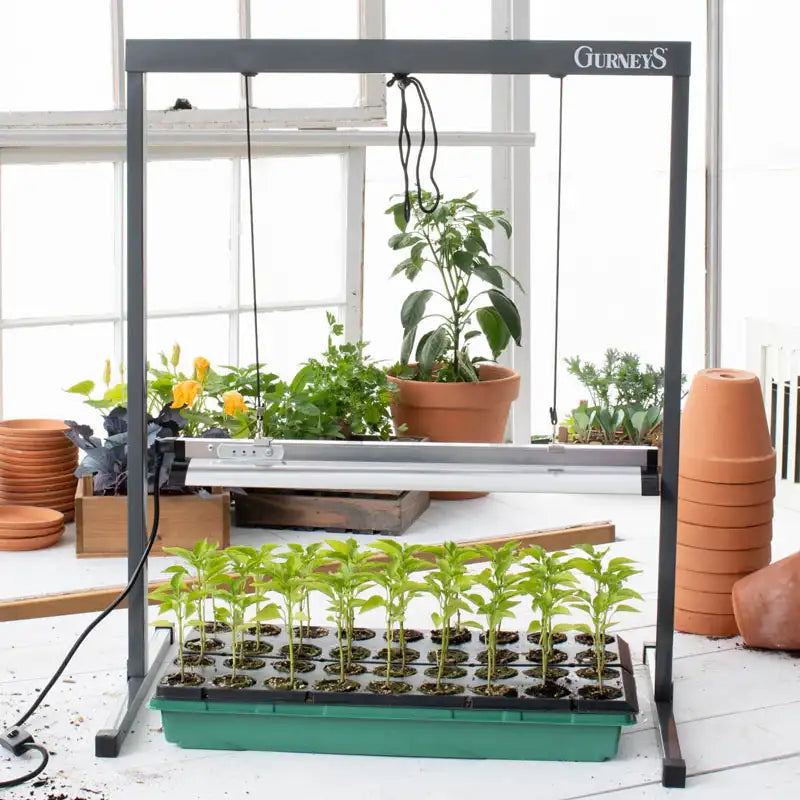
- Light!
- Your so-called "sunny windowsill" is closer to a war crime than proper plant parenthood. How cold does that window get at night? How long does it get sun during the day? Is that sun even coming at the right angle for effectiveness? (The answer is no unless you're living in Australia or near Skull Island.)
- We are out of time and space. Next week: light!